The Stat inventory team will have sent hardware to the location. Before arriving on-site, confirm with the organization contact that the inventory has arrived, ask where it is located, and how to access it upon arrival. Coordinate the day(s) and time(s) for installation.
Dimensions
Exam room tablets are:
-
Length: 10 3/4"
-
Height: 7 1/2"
-
Width: 1 1/4"
-
Screen: 10"
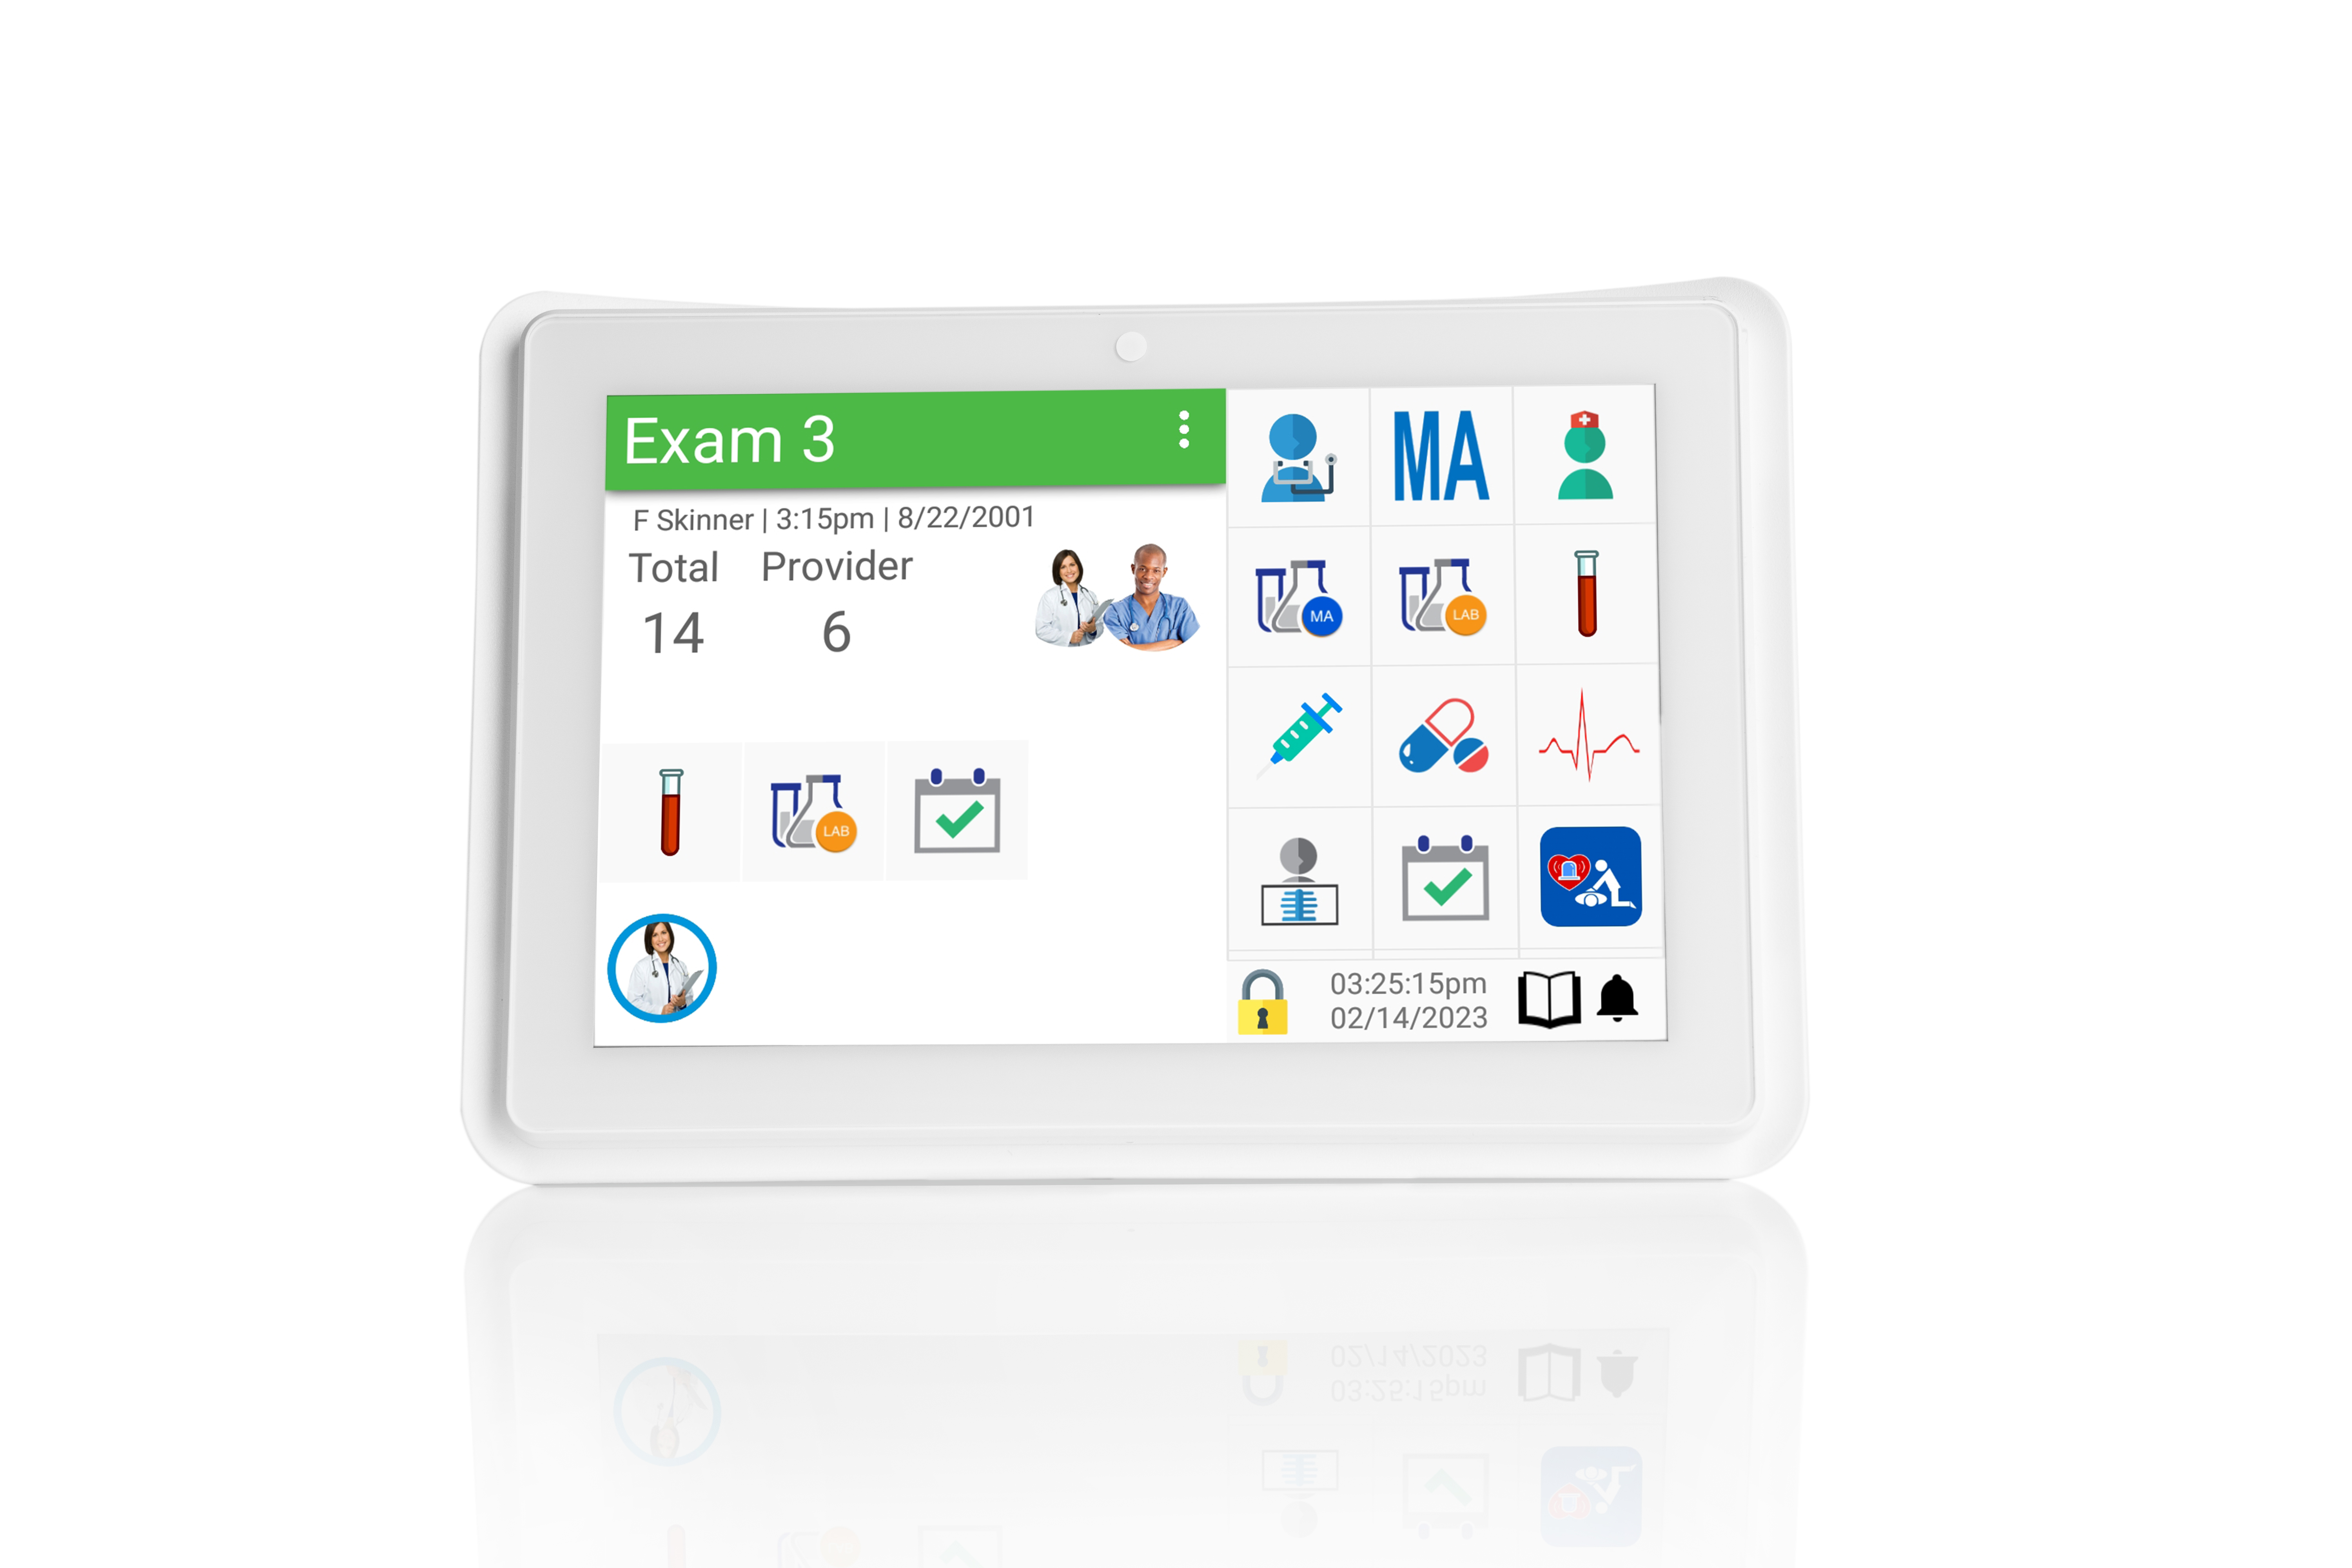
Installing Tablets
1. Ethernet cords are plugged into the switch and are dropped near the tablet boxes.
2. Plug the receiver into the USB input for all 'interior' tablets and a sufficient number of 'outside' tablets.
3. Plug the ethernet line into the tablet to power it on.
4. After the device has powered on, name the device in the Stat app.
-
Select Devices.
-
Select the "+" icon.
-
Enter the entire device ID that is found on the tablet including "Sync" at the beginning so the entire ID will be "Sync0631". (There will be a sticker on the back or you can tap on the date/time.)
-
Click "Add Device"
-
Click back out to the open space, refresh the Devices page and search for the device you just added.
-
Click on the device you just added.
-
Click "Assign to Room", choose the organization, department and room.
-
Choose "Is Inside" if true. If not, leave the checkbox unchecked.
Click "Save".
Tablet Installation
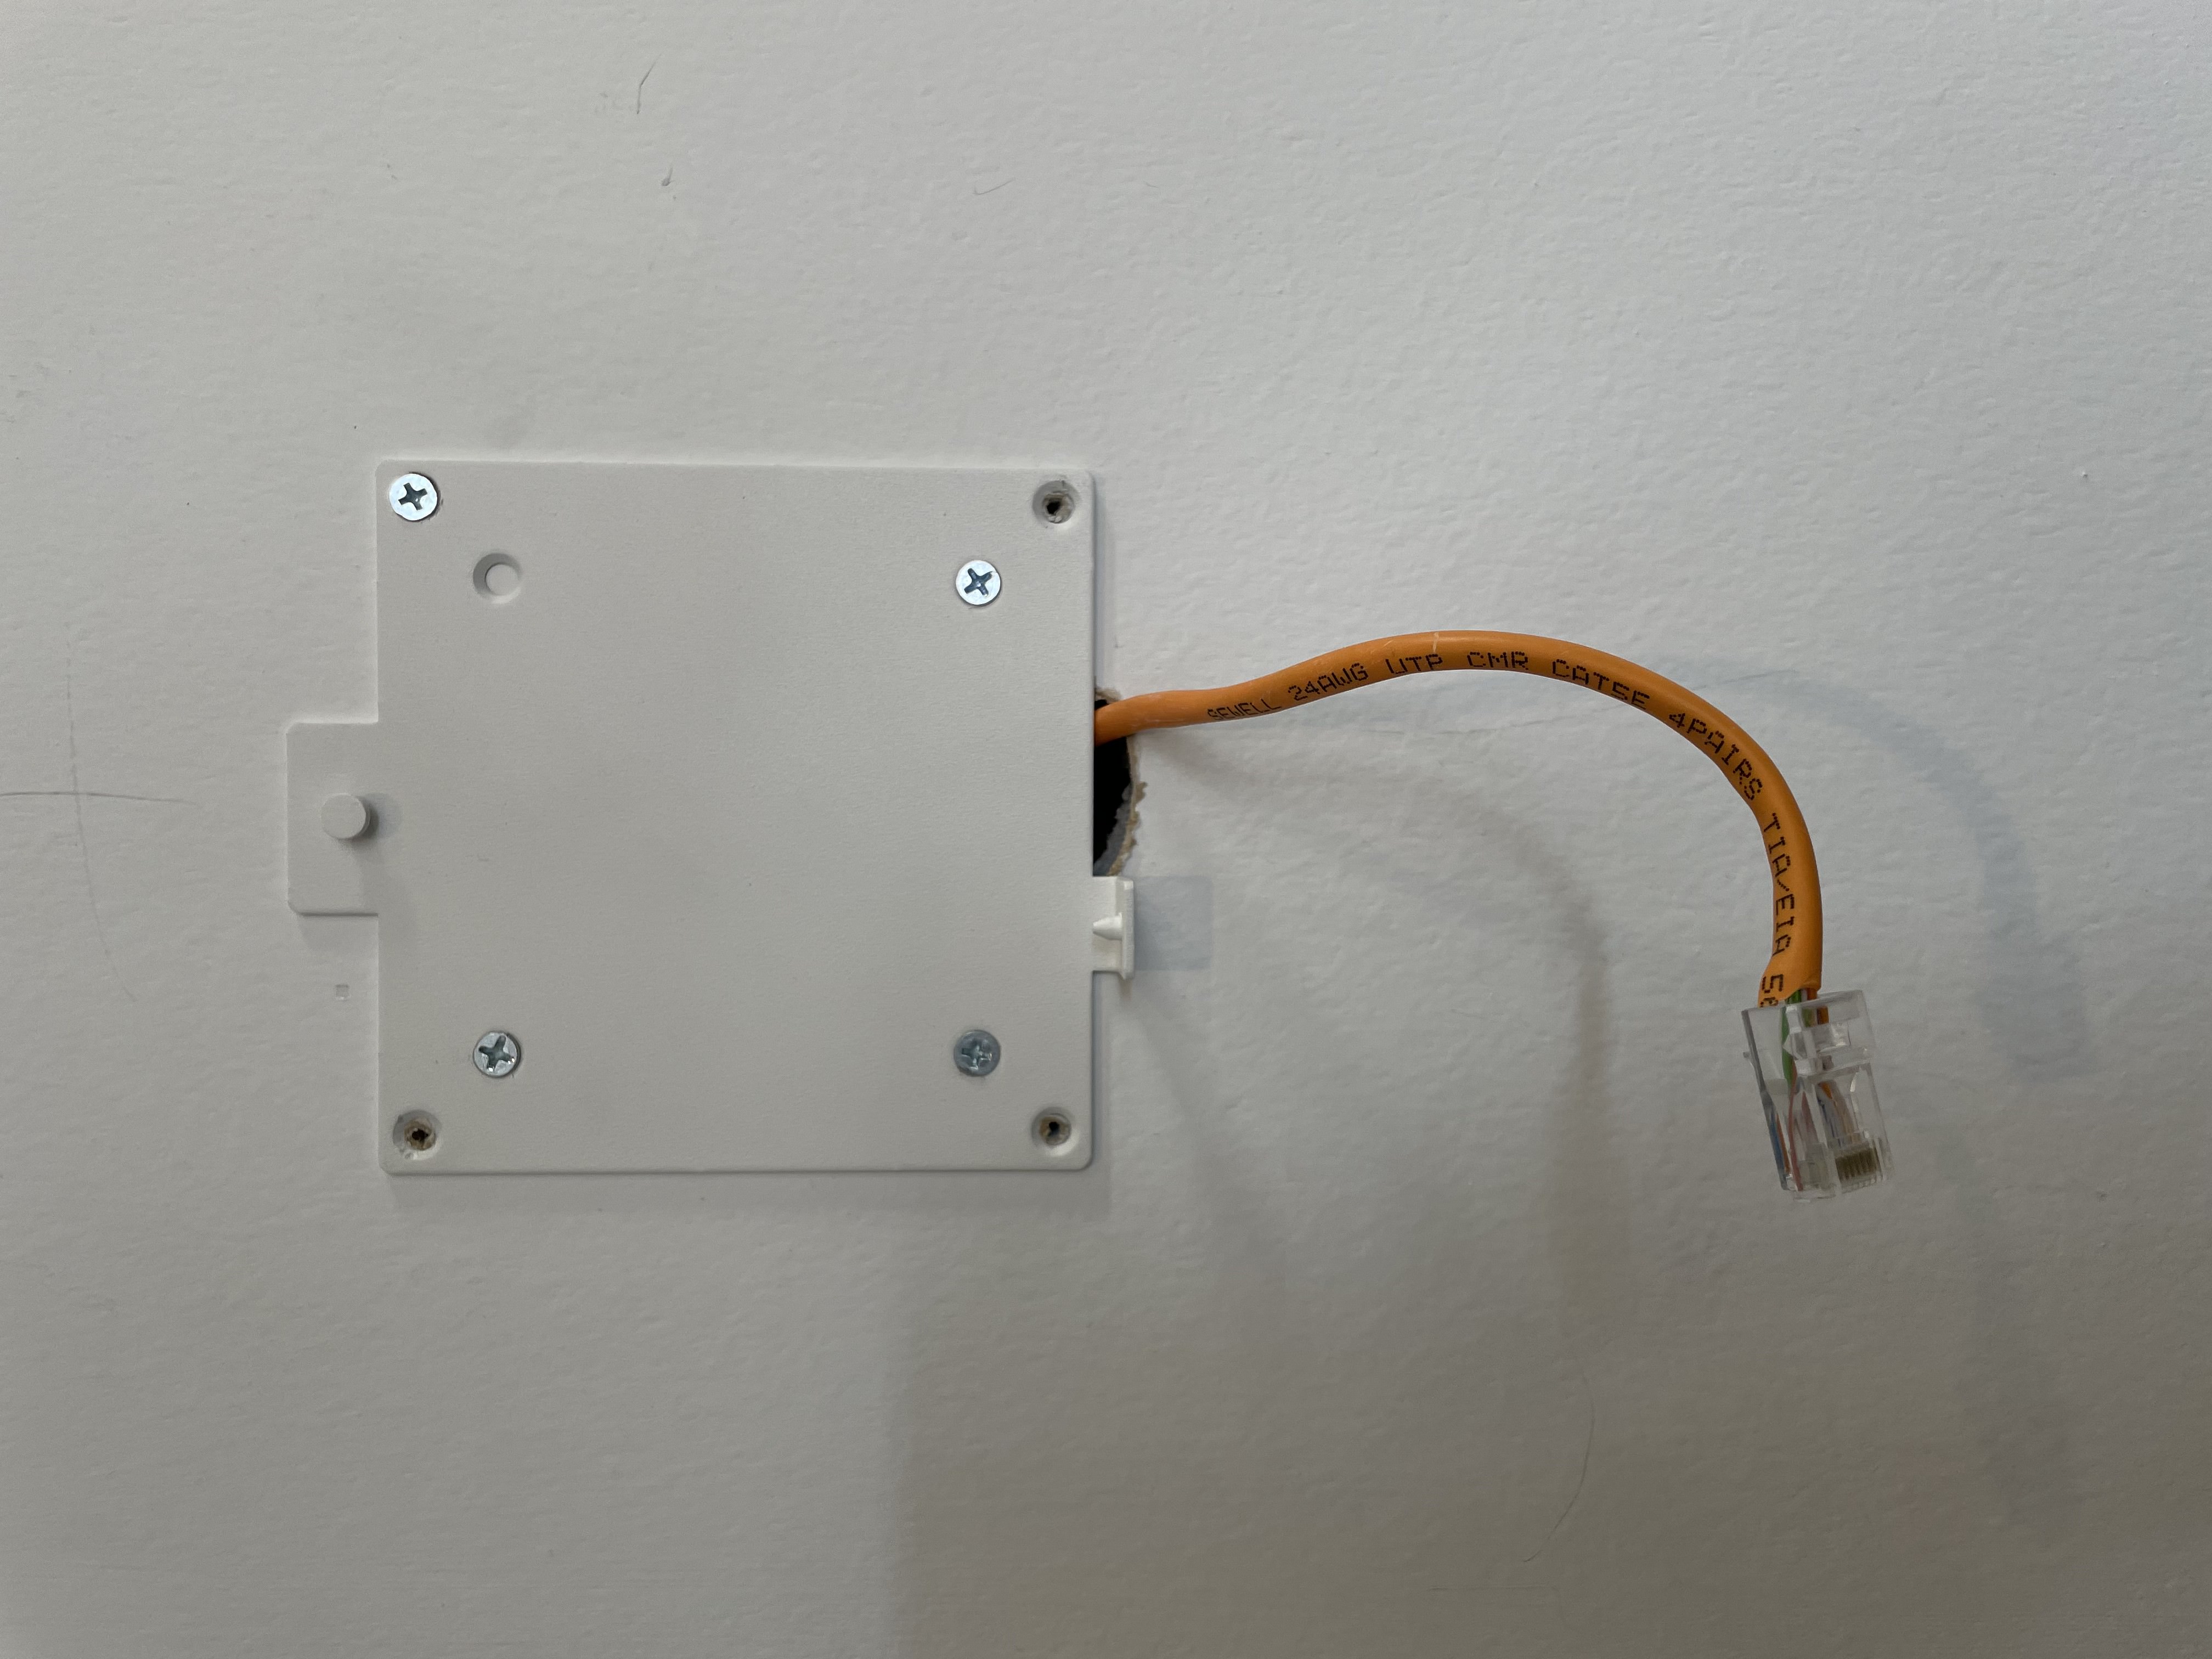
Step 1: Make sure the ethernet cable is dropped from the switch in the ceiling to tablet location.
Step 2: With a level, screw in base plate to wall with 4 screws (make sure there is enough room between base plate and opening in wall so that the ethernet cable can move freely under it).
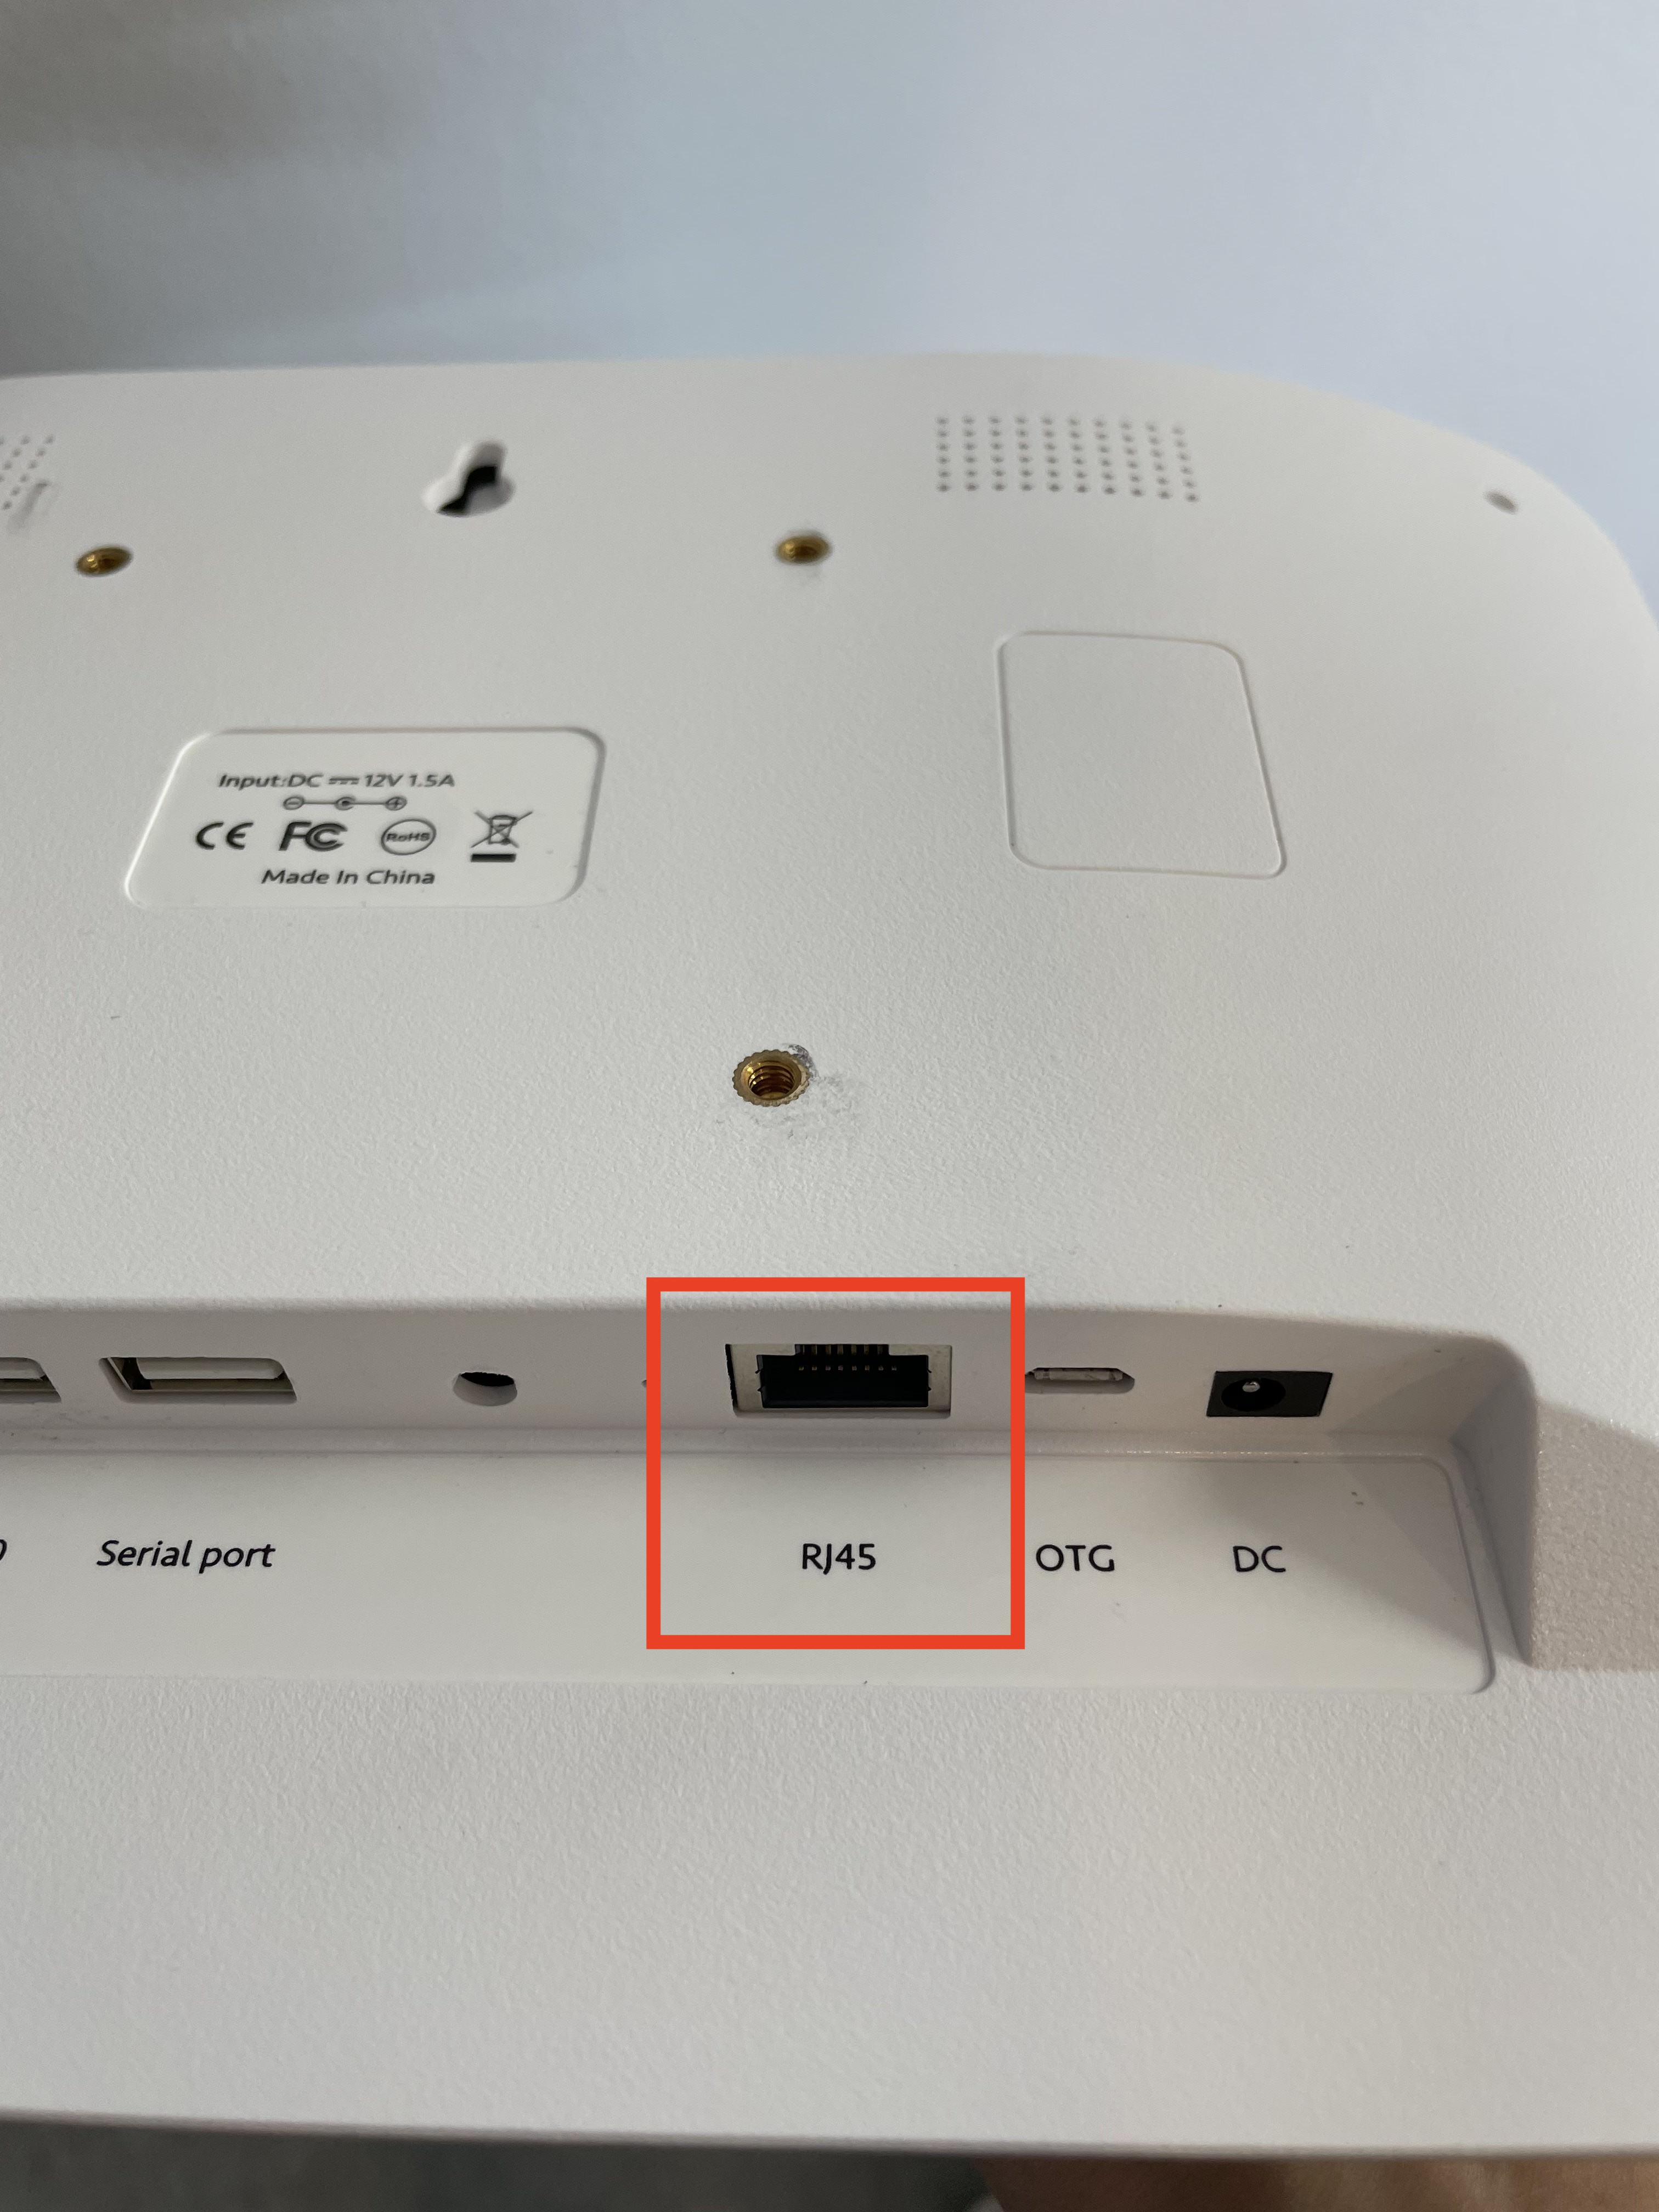
Step 3: Plug the ethernet cable into the "RJ45" port in tablet.
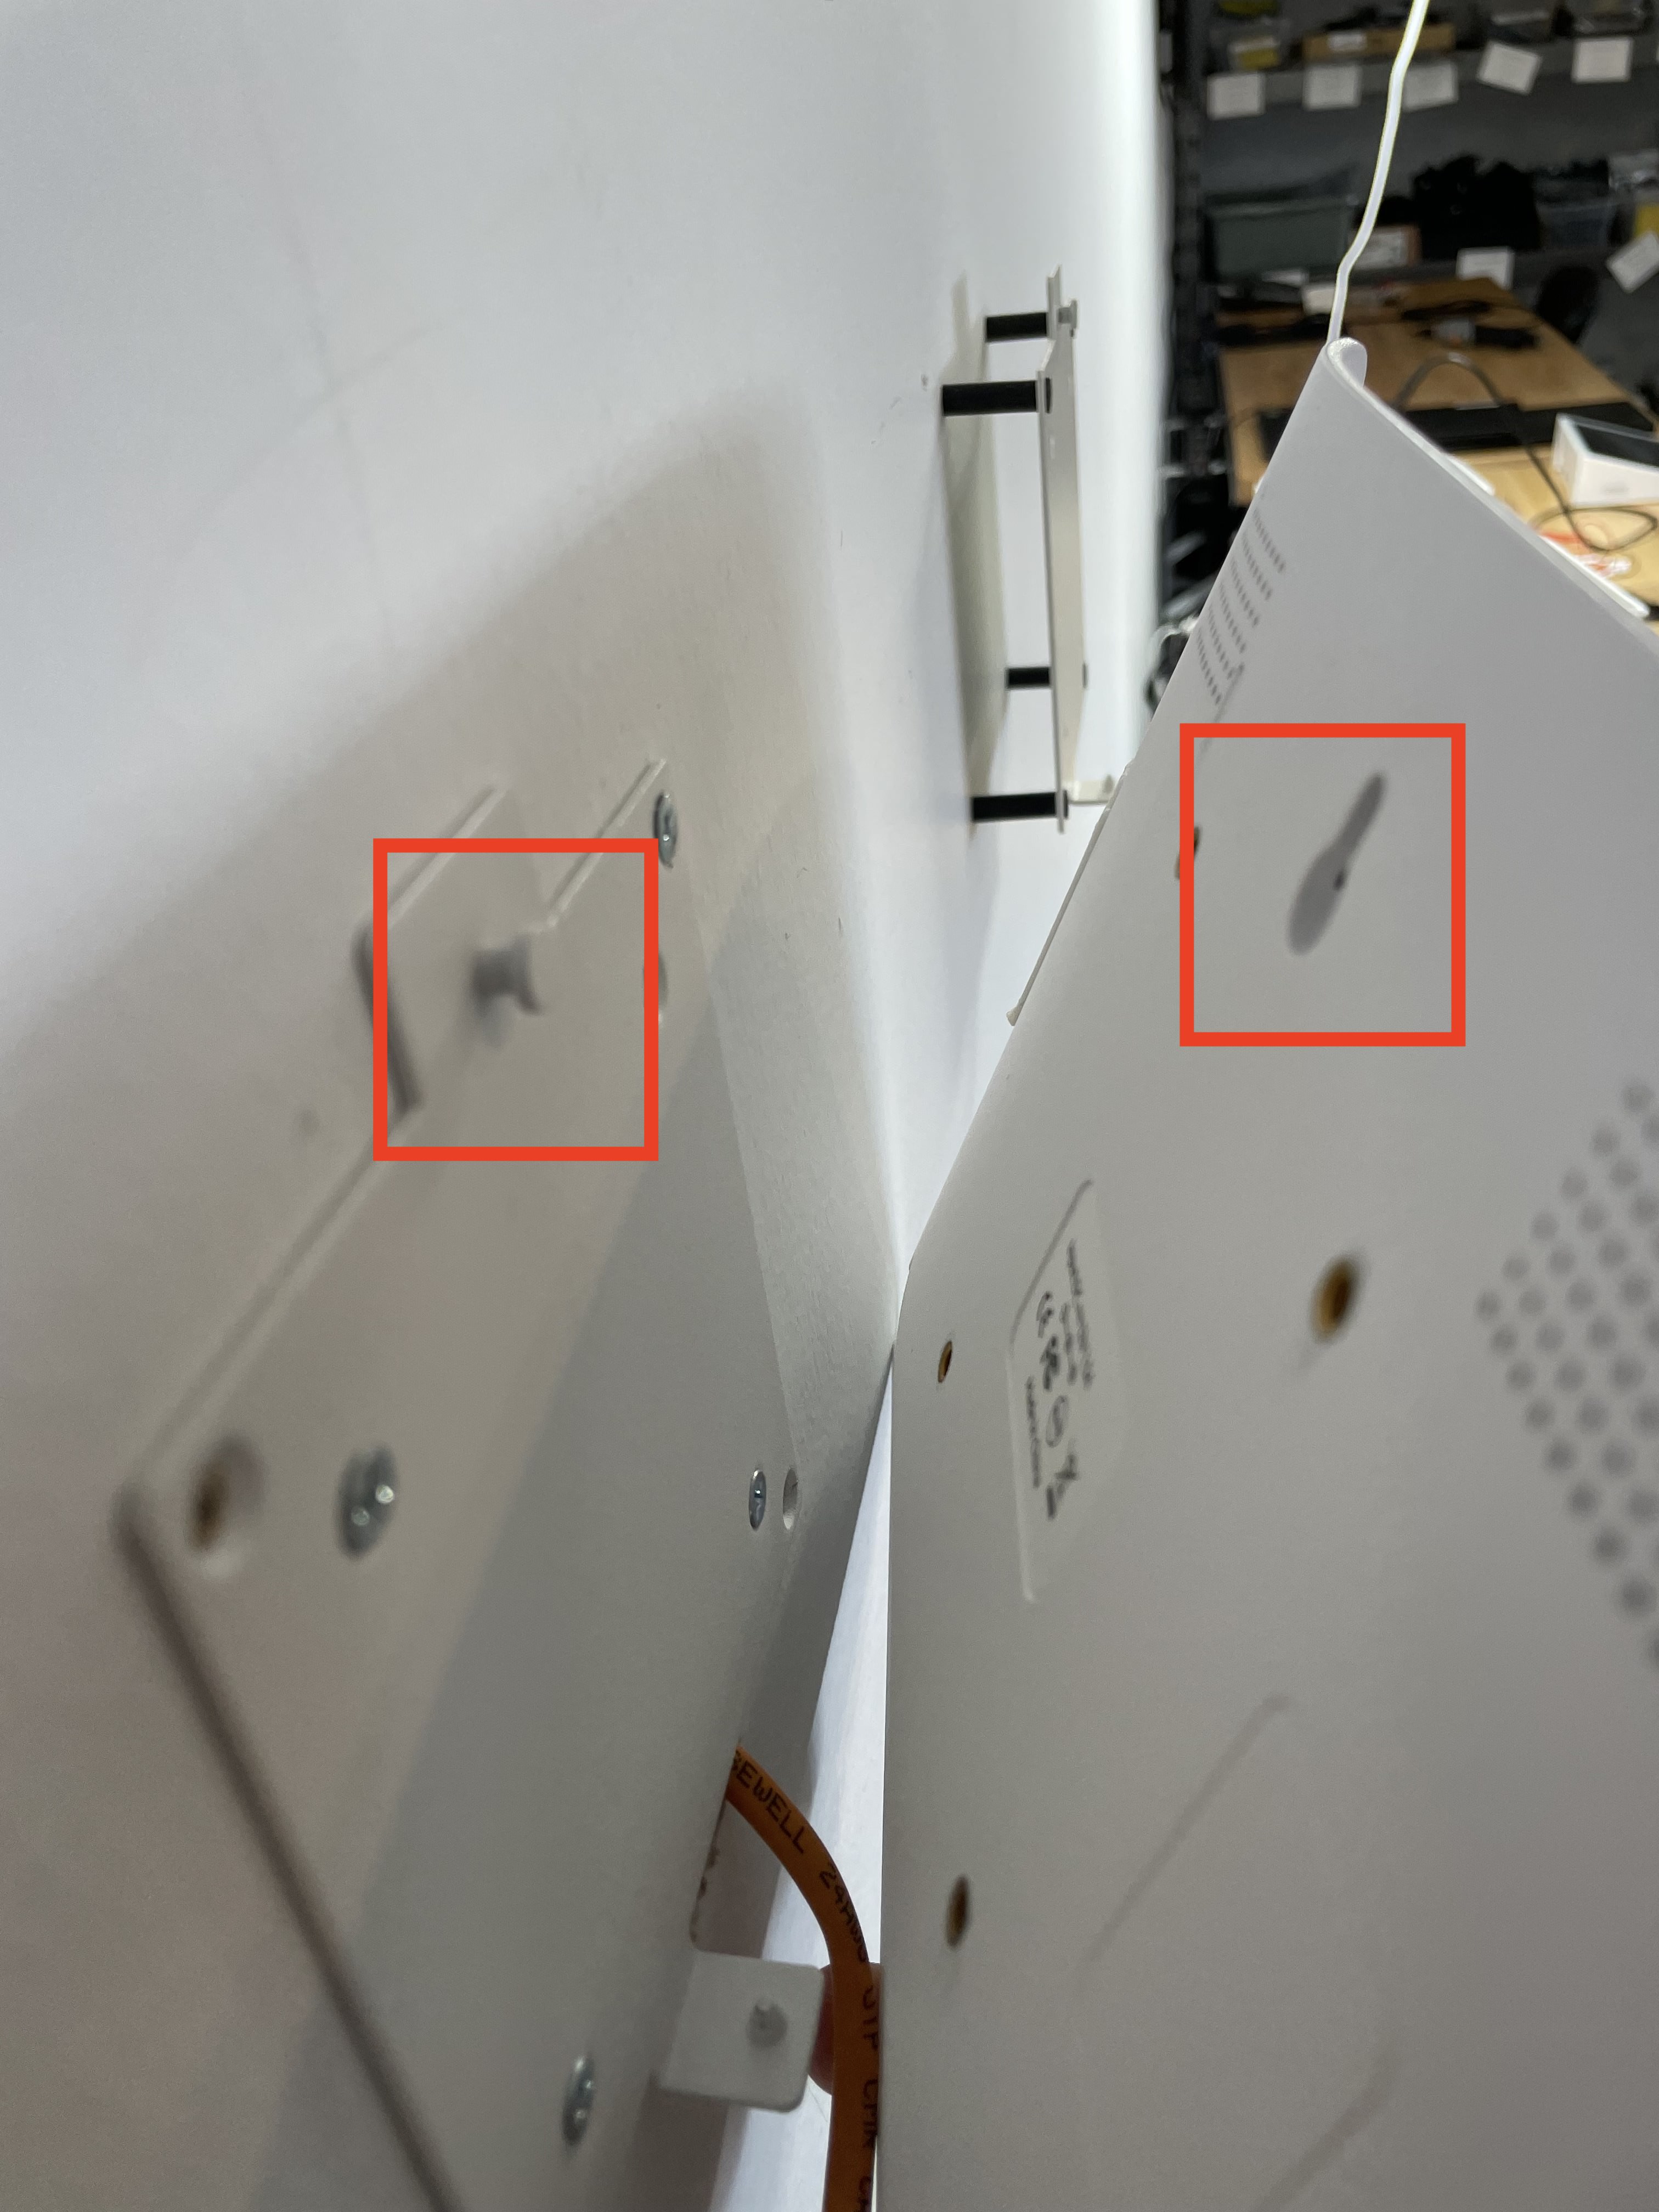
Step 4: Mount tablet on the wall by sliding hole in tablet to baseplate. Make sure it's secure with the hole on the bottom of the tablet as well. (The ethernet cable might require some maneuvering to be able to be put back into the wall so it's not showing).
Step 5: Tablet should turn on automatically indicating that there is power going to the tablet.
*IF RECEIVERS***(what does receiver mean) ARE NEEDED*
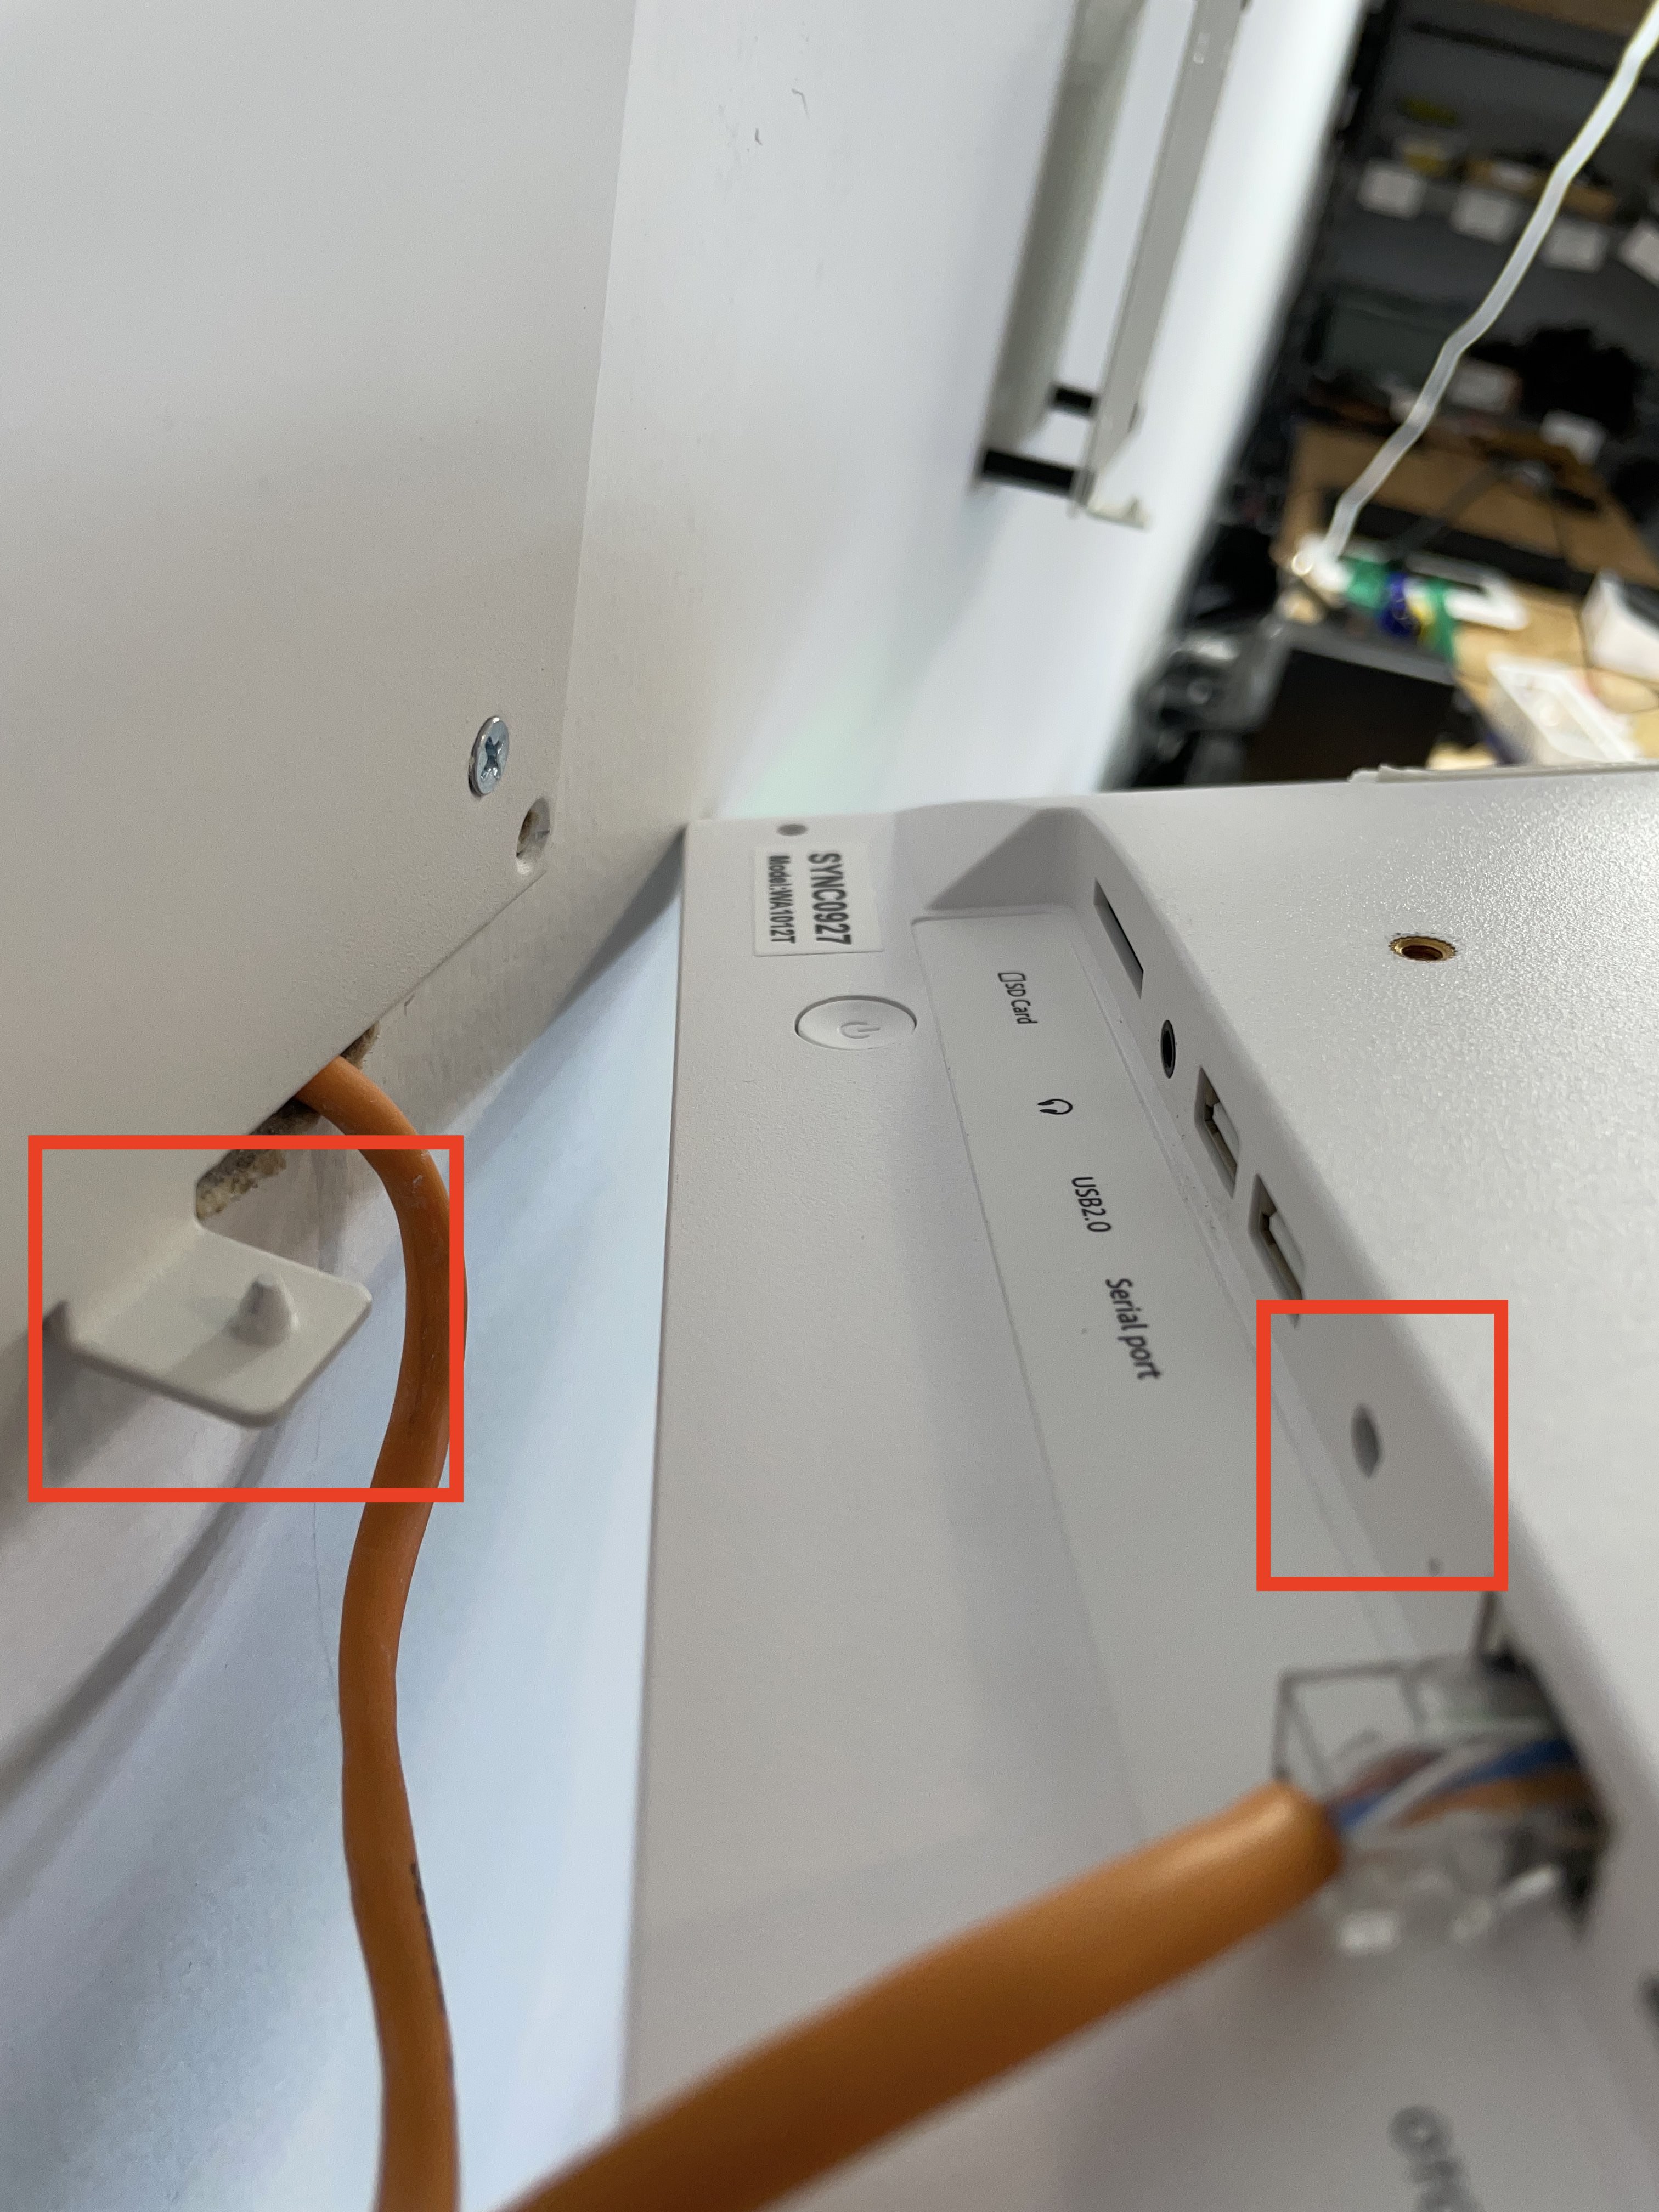
Step 1: Remove tablet from wall by lifting up and pulling outwards gently. This is for easy access to port.
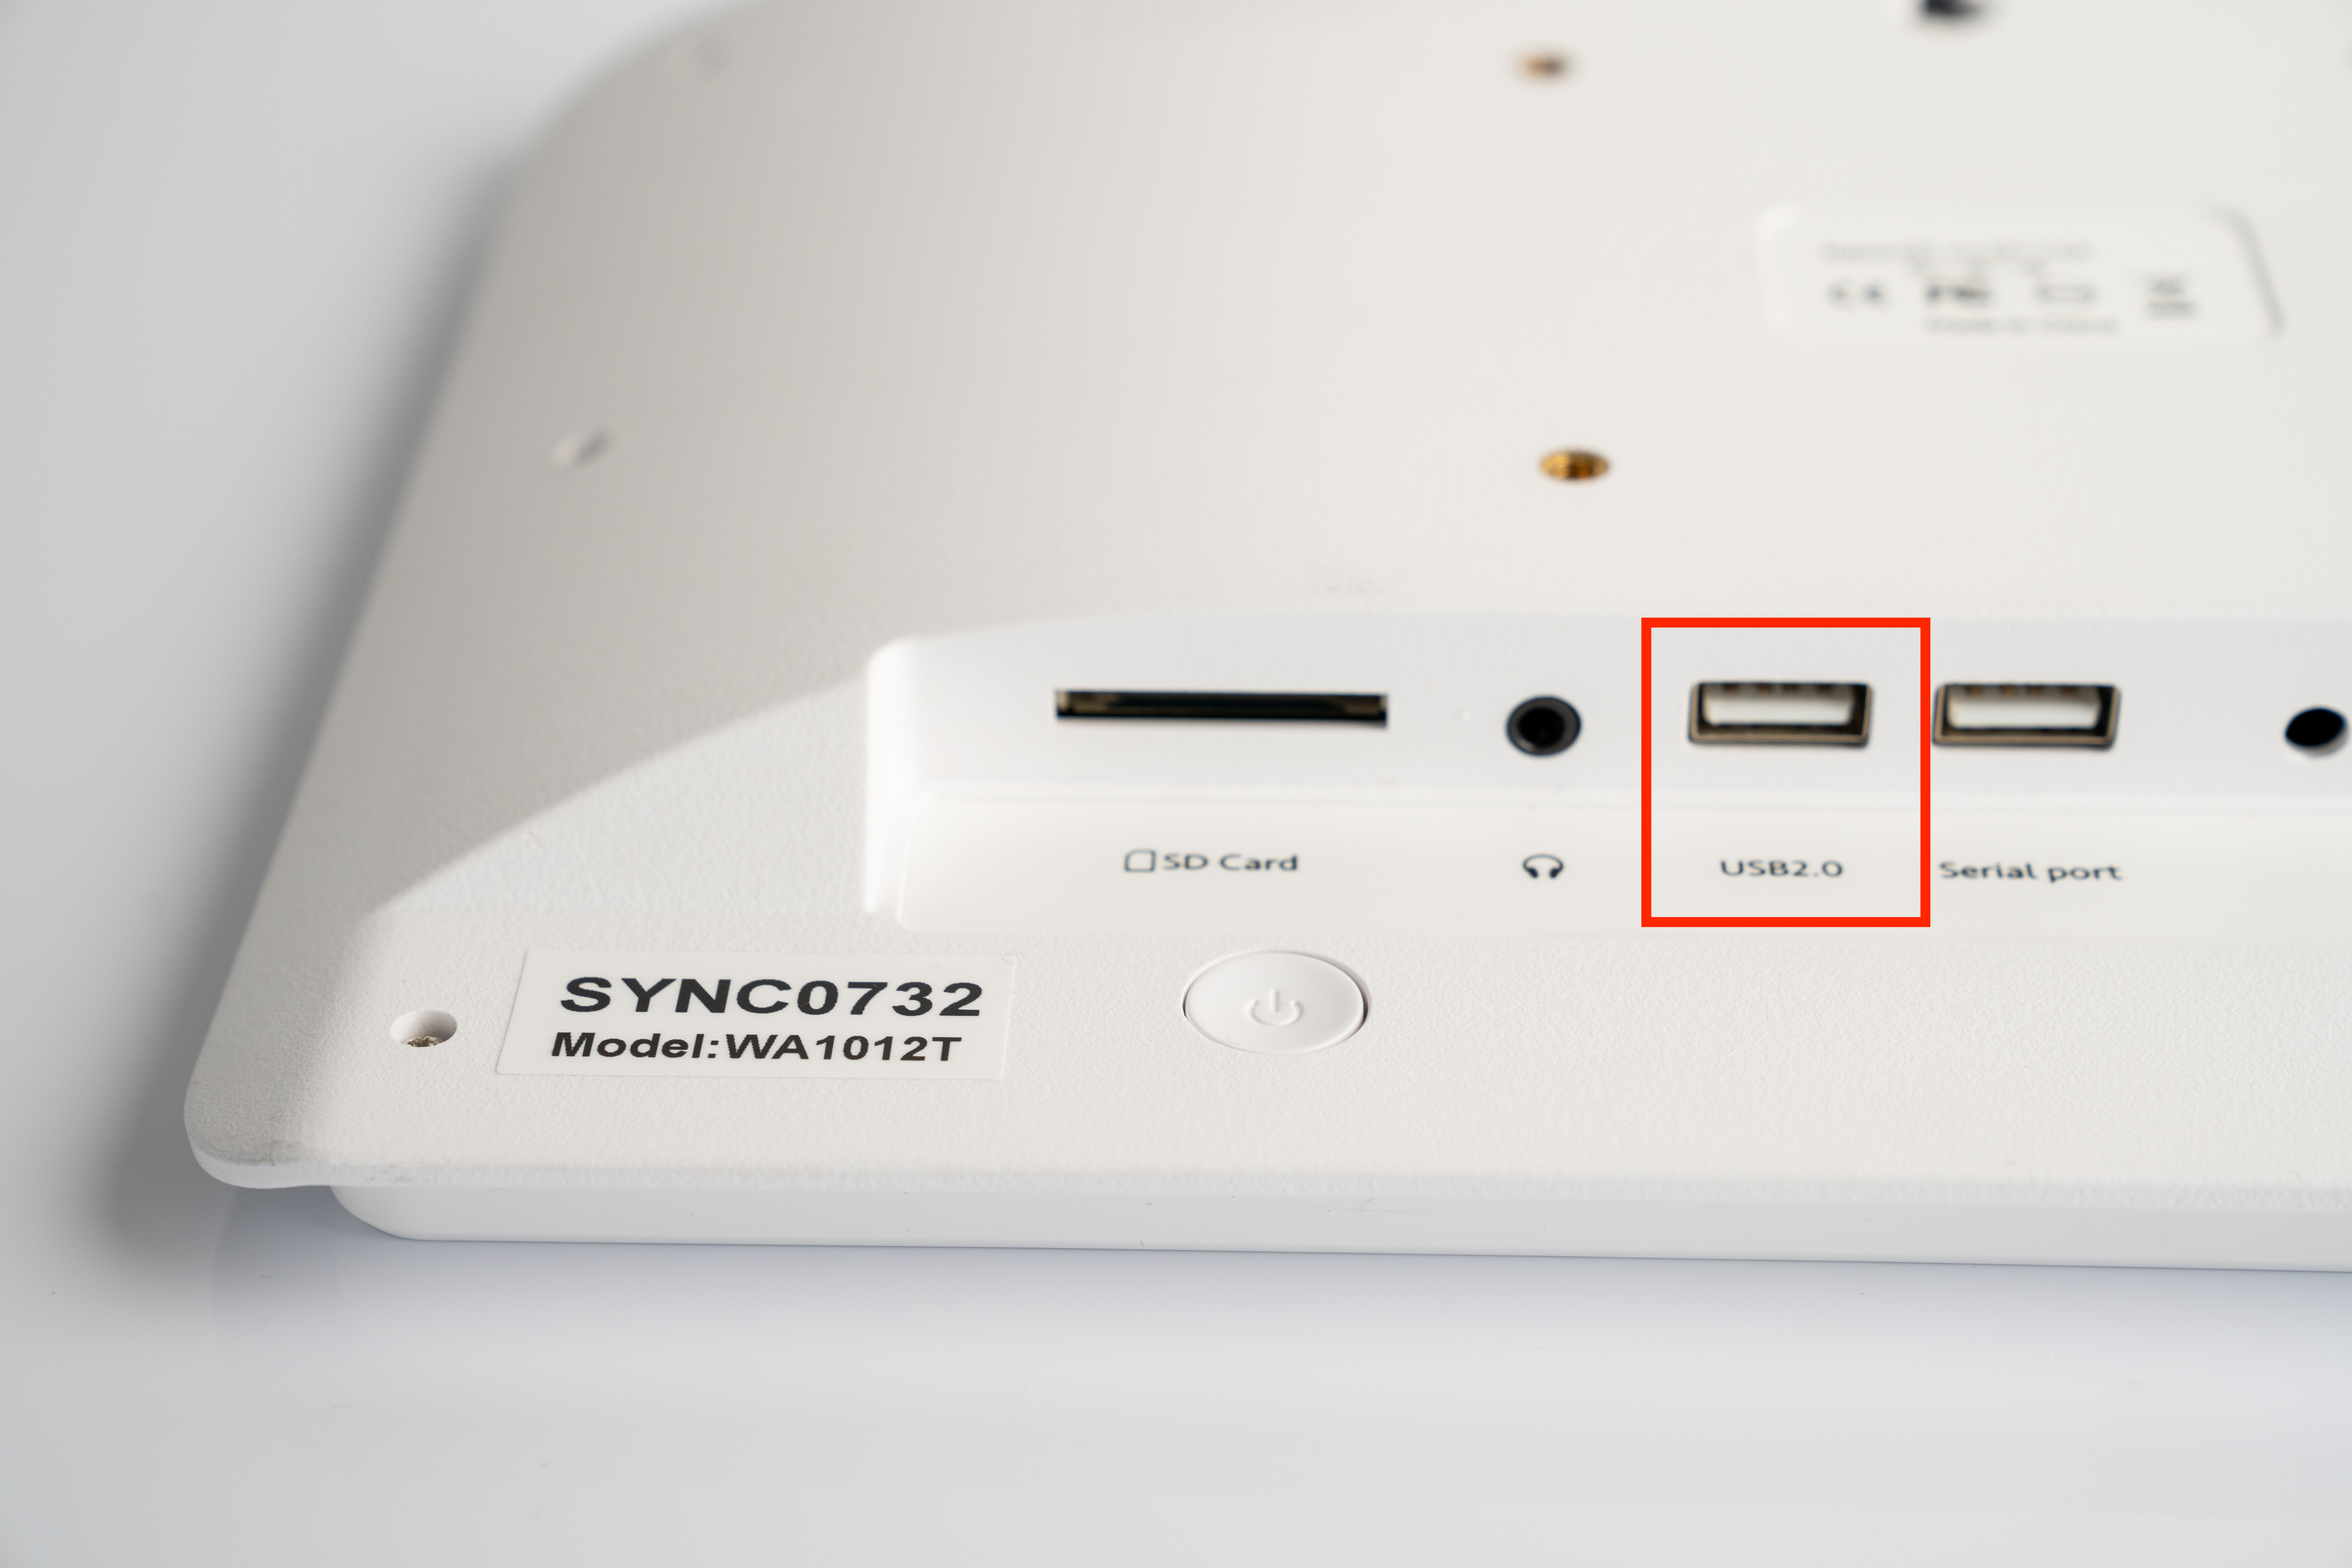
Step 2: Plug receiver into "USB2.0" port under tablet. Do not plug into "Serial Port".
Step 3: Mount tablet back onto wall.